There’s a reason every office building, mall and hotel has a permanent map as soon as you walk in: People want their information relevant, easily digestible and accurate, and there’s no better way to introduce them to your space by providing exactly what they’re looking for.
Tablet computers are ideal building blocks for businesses looking to convert static displays to dynamic information kiosks. Tablets are inexpensive to buy, and even less expensive to maintain — there’s no hiring a print shop or sign painter to change information, and no maintenance team to manage and organize displays. With a couple of clicks in an online database, every kiosk within Wi-Fi range has the update.
And tablet-based kiosks can do much more than any static display ever could. Whether presenting information in multiple languages, using touchscreen menus to quickly navigate a wealth of information, or even hosting a face-to-face call with someone who can provide greater assistance, tablets make it easy and uncomplicated to create an informative, user-friendly experience.
How do you make all this work? Here are four key steps to creating a tablet-based kiosk.
1. Define objectives
It’s OK to start with a vague initial thought: “I want a map,” or “We need a product catalog,” or “Our daily schedule doesn’t meet our needs.” But before you go any further, you need to lay out a clear vision of what the end result is going to look like.
An information kiosk usually presents a seamless interface and runs a single application, so your definition doesn’t need to be complicated — and shouldn’t be, because complicated kiosks are not very successful. It’s easier if you have a single application already selected, but it’s not required. Because modern tablets are based on modern browsers, building a web-based application for a kiosk is not a major undertaking.
Simplicity is important, but so is being specific and clear. Be sure to answer these five questions:
- What specific information will the kiosk present, and how will that leverage the kiosk’s interactive power? For example, event information might be the starting point, but a map and directions might be the very next thing guests want to see.
- What kinds of users will engage with this kiosk? Also establish a rough idea of the number of users, because kiosks usually only service a single user at a time. This helps in planning the number of stations.
- Where will the information be stored and updated? Ideally, a kiosk will be connected to an online system using Wi-Fi (or Ethernet if necessary) that provides constantly updated information. Standalone tablet-based kiosks don’t deliver the kinds of information people are accustomed to getting today, and will take more effort to keep updated.
- How much time will they spend at the kiosk? When you define the time window, whether it’s “10 seconds” or “10 minutes,” you set expectations about the experience at your kiosk.
- Will you need special hardware features, such as printers or cameras? If you want anything beyond a touchscreen, get that requirement down on paper early.
2. What should the kiosk look like?
There’s a big industry of companies making specialized mounting hardware to secure tablets of all sizes, which offers a lot of flexibility and options to the implementing team. Do you want something in a standalone cabinet? Mounted to a wall? That a user can carry around? Having a vision of how it should look will help your team select the right mounting system.
A diagonal screen size of around 10-in. is very common, and tablets of that size can be purchased for $250-$500 — although the cost of the tablet itself is not a major part of the whole project (more on that later). Smaller screen sizes, such as the more compact 8-in. tablet are also available, with prices in the $150-$300 range. Larger screens are available as well, both in tablets and as standalone touchscreens, but they do drive up costs.
Keep in mind any special hardware features you might want to use, such as cameras and external printers, and how they will integrate with the kiosk. For example, a kiosk that looks like a traditional lectern won’t offer a particularly pleasing camera angle — you’ll want something that faces the user head-on.
Avoid keyboards, whether real or virtual, which can be frustrating and time-consuming when used for anything longer than two or three words. Mice and styluses should also be eliminated except in controlled environments. Touchscreens with simple tap gestures should be all that’s needed to navigate. This also simplifies the construction of the kiosk and gets information out front, with minimal distractions.
3. What’s the use case?
This step is where the project gets handed from business leader to IT group, because the following steps involve technical implementation. This is also the time to include any special cases or details, such as multiple languages or specific data sources (such as nonkiosk applications) to be used.
It’s important to have the big picture of how the kiosk will fit in with other applications, either in place or in the pipeline. If the kiosk is a natural complement to a mobile application or needs similar branding and user experience, this is the time to get these details on the table. Integration between user mobile devices and the kiosk application can be simple, such as by taking a picture of a QR barcode displayed on the kiosk, if that helps extend or improve the experience.
One great way to hand off the project at this point is to use “persona-based” scenarios. These help explain your vision to the technical team responsible for implementation. Personas are a simple way of presenting different use scenarios, and they help everyone involved in the project get on the same page.
For example, if you’re creating a catalog kiosk for use in a retail location, you might define “Pre-shopper Pete,” someone who already knows exactly what he wants when he comes into the store and just needs to get to the right location as quickly as possible. Then there’s “Economical Ellen,” who is interested in knowing where you’ve placed the discounted and marked-down items today. Finally, “Browsing Billie” wants to find a particular department so they can browse items without anything specific in mind.
If the cute persona names and specific flows are too much or don’t fit, don’t worry — the key here is to describe how a user is going to approach the kiosk and get information that is accurate, useful and received as efficiently as possible. You could, for example, just write “a user will walk up to the kiosk, find their event on a list on a single page, touch it and see what room it is in and when it starts and ends, along with a map of how to get there.”
The more time you spend defining what you want now, the better the chance you’ll get it, so get as many details down as possible.
4. Design with a lifecycle view
Your project is now in the hands of the technical teams handling implementation, but there’s one last piece of advice to give them: keep lifecycle costs in mind at all times.
The tendency for IT teams will be to immediately look at hardware and software one-time capital costs: how much the tablets and mounting hardware costs, and the cost to design the application. But these costs are only a small part of the big picture. The real costs are management and maintenance.
From the first moment, converting a standard off-the-shelf Android tablet into a kiosk device, locked and secured, can take hours of effort, and is error-prone even for teams accustomed to dealing with tablets. Thinking about the mundane details of how tablets will be deployed, updated and managed is easily overlooked — and you shouldn’t let that happen.
Fortunately, you’re not the first organization to want to use tablets as an accelerator for a kiosk project. Tablet vendors are building infrastructure beyond just providing tablets — they’re helping with the total lifecycle. These cloud-based software tools can grab a device, push a rock-solid configuration to it and define all the critical kiosk features, such as disabling buttons or system management functions, or applying corporate branding.
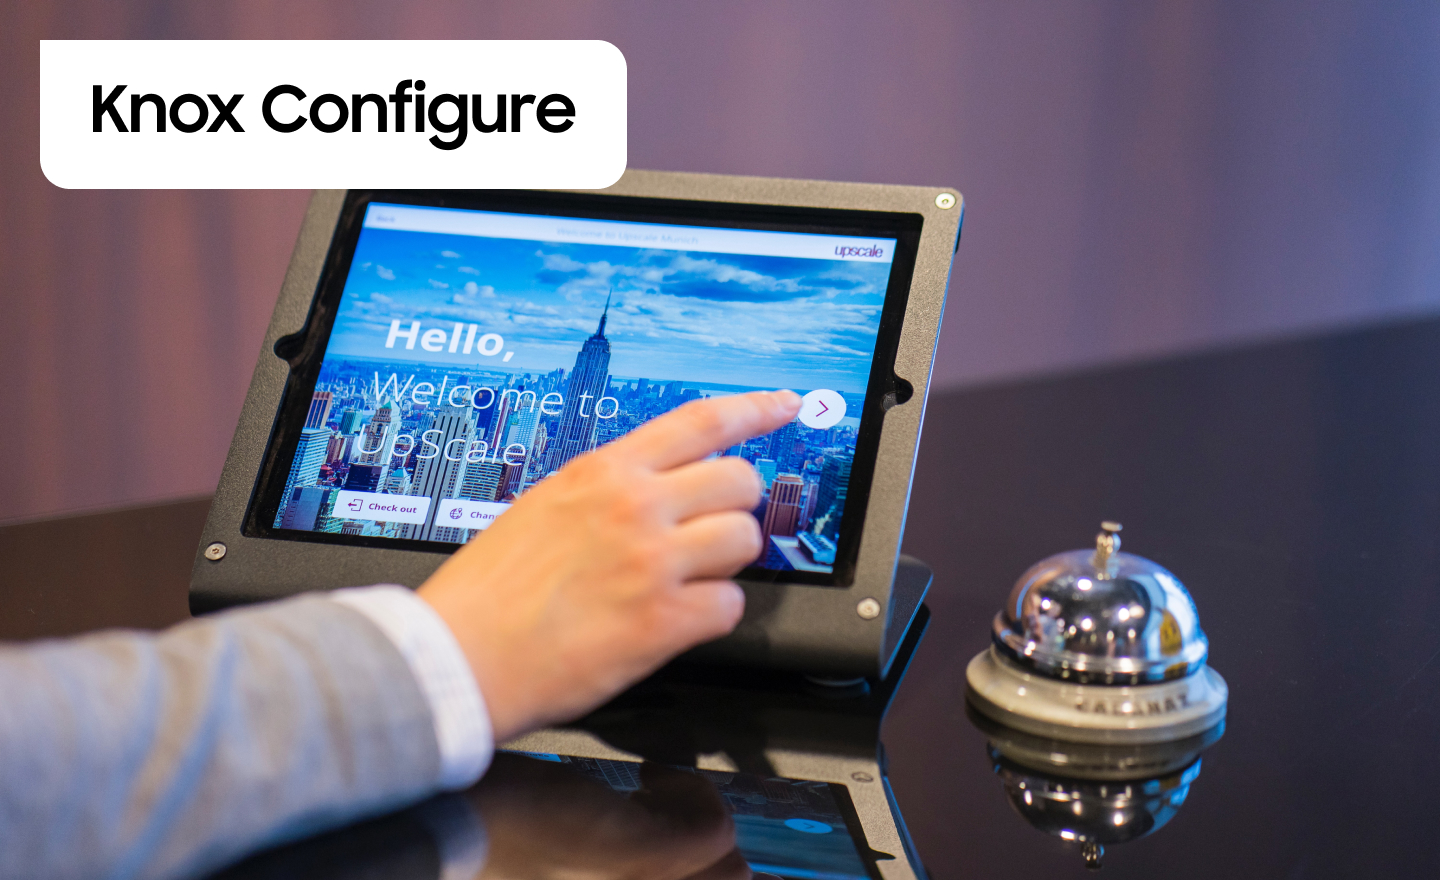
For example, Samsung’s Knox Configure tool includes “ProKiosk mode,” which provides a long list of settings needed to fully turn an Android tablet into a secured and dedicated kiosk device — everything from screen timeouts to audio levels to network definitions to autolaunch of specific applications, and all the settings in between — some of which aren’t even available in the normal operating system GUI. Knox Configure also provides for continuous updating — changing profile settings or updating software as the project moves from development to operations phases.
Using off-the-shelf tablets, mounting hardware and configuration tools such as Knox Configure, you can move quickly and economically from business vision to technical implementation.
Wondering how device customization can make mobile devices perfect for any use case in your business? Learn more with our free white paper.